Mail app (Windows 10) Settings
The info below shows how to set up an email account in the default Mail program that comes with Windows 10. Click on any of the thumbnail images to view the full size screen shot of each step.
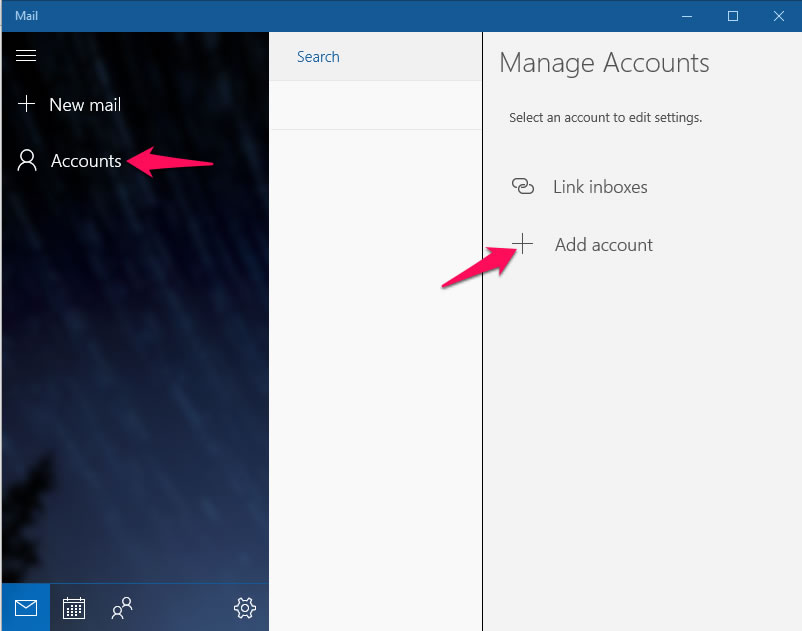
1) Open the Mail app and then click on ACCOUNTS on the left sidebar. This will bring up a menu where you can choose ADD ACCOUNT to get the process rolling.

2) A new window will pop up in the center of your screen. Hover your mouse pointer over the right side of it and the scroll bar will appear. Scroll down to the very last option, ADVANCED SETUP, and click on that.

3) On the next screen, click on INTERNET EMAIL.
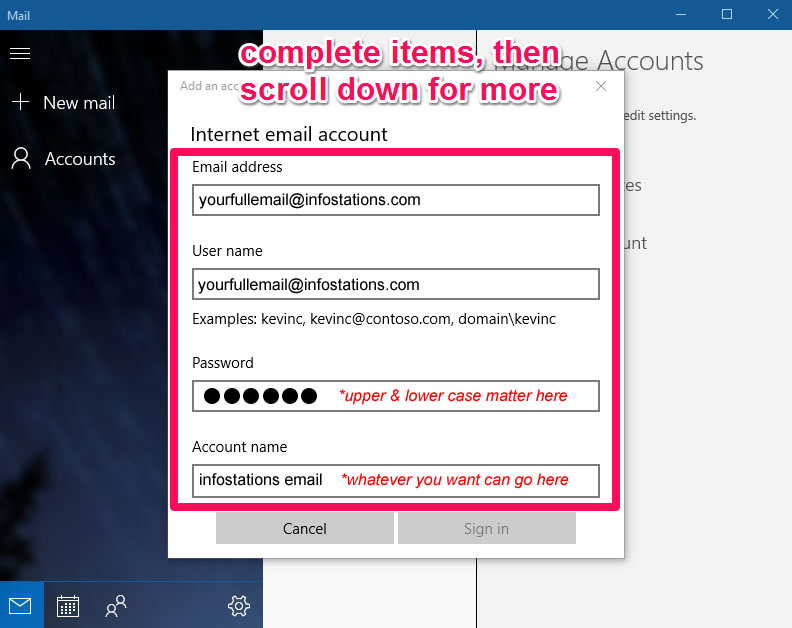
4) Fill in the first several items as shown in the screen shot image (click image for large version). Then scroll down to continue filling in the rest.

5) Again fill in the next set of items as shown in the screen shot image (click image for large version). Unlike previous versions of the free Mail program in Windows, this one does not have a spot to enter server port numbers. The incoming server does not need one entered (the default is already 110, which is correct) but the outgoing does. So you will enter that as smtp.infostations.com:587.
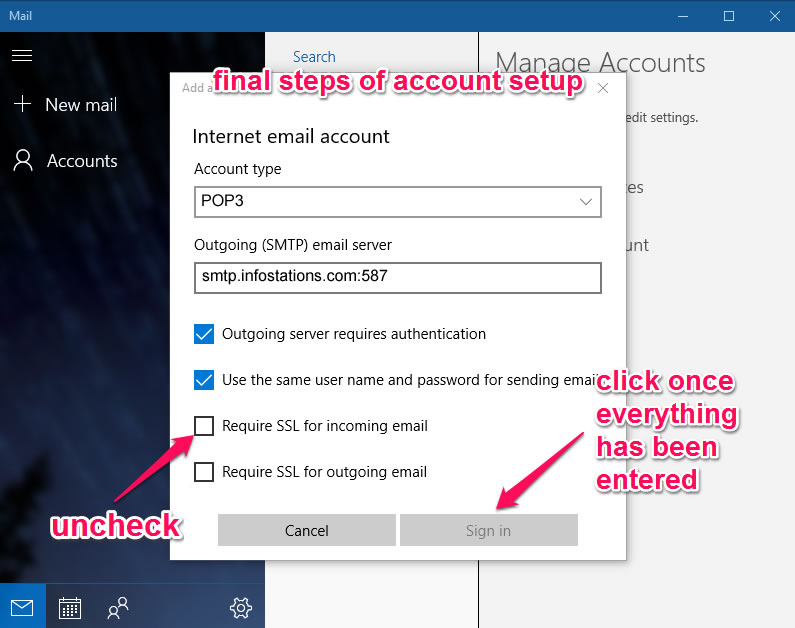
6) In the final step, you just will need to uncheck the boxes for Require SSL for incoming email and Require SSL for outgoing email as shown in the screen shot image (click image for large version). Then you can click on SIGN IN and if all is correct, your email account will be set up and you can begin sending and receiving email in the Mail app.